If you are tired of spending hours editing your images to achieve the ideal look. And if you don’t want to waste time making repetitive tweaks. Here is an easy preset tool to achieve professional results in seconds. Yes, Lightroom presets are the best solution. Using this tool, you can apply these pre-fixed settings to get a specific style or appearance.
However, one must know how to import Lightroom presets before applying its beautiful effects. Installing and importing presets is similar across different Adobe Lightroom platforms, including desktop, Adobe cloud, and mobile. This article discusses the guidelines for importing the Preset in Lightroom and upgrading your photo editing skills.
The article will guide readers to enhance their photo editing skills by learning “how to import presets into Lightroom.”
Tips Before Lightroom Import Presets: Important Steps
Organize Folders
For editing, it’s important to organize folders that are helpful to continue the smooth and convenient import process. Professional photographers organize folders and subfolders and sort it according to date, event or category. The arrangements are helpful in structuring the folders for easy access and saving management time.
Set Import Preferences
Professional photographers set the import preferences according to their requirements. It assists in configuring the import preset location, name and files. Users can apply metadata, keywords and backup or secondary storage for data protection or recovery.
Connect Storage Devices
It’s necessary to connect your storage devices with the PC or Mobile devices you will use for the Lightroom import preset. The memory cards, hard disk, camera and external drive are linked to the desktop, and their recognition is necessary for all connected equipment. These devices are perfectly linked and show a professional outlook.
Arrange File Settings and Location
Another key tip is to set the file’s location to manage the preset when importing it effectively. Make sure that the location and setting fit with the file’s structure. Recheck the file name, format and metadata for proficiency. All these tips are crucial to achieve the desired outcome within a minimum time.
Importing Lightroom Presets on Adobe Lightroom Classic on MAC or Windows
Adobe Lightroom is the best photo editing application for PC and MAC(iOS) devices. It supports different presets, including XMP Files. We will discuss the Windows (desktop) and MAC version methods to import presets.
- Three methods are used to import preset such as :
- Import Preset Through Preferences
- Import Presets by Import Preset
How to Import Lightroom Presets On Mobile Devices?
Adobe Lightroom CC is a free mobile version. It’s the best option for beginners or non-professionals using mobile for editing. There are a few different methods to import presets on mobile devices. All the methods have certain distinctive procedures. Let’s explain all the methods individually.
Method 1: Synchronization with Lightroom Classic
This method is linked with the Lightroom Classic version. When you download the preset on a desktop, it automatically imports into mobile. Just login to the Creative Cloud; now, you can use it on mobile devices and don’t need to upload every preset again. When you only upload it to the application, it automatically applies to Lightroom Classic and Creative Cloud simultaneously. This feature of Adobe Lightroom is known as “synchronization”.
Method 2: Import Preset by Using The Lightroom App
For the process, follow these steps to import the preset:
- Install Adobe Lightroom software on Android or iOS mobile devices.
- Open the app, click “New project”, and upload photos and videos in your interested folder.
- Next, click on the “Preset Icon” at the bottom of the app’s first page.
- Press the three dots “⋮” at the top right corner of the application and click on the “Select import Preset icon.” After that, wait for a few seconds, and the window will pop-up within seconds. Now, choose Preset in “Preset collection” to apply your desired preset to images or videos.
- Then, the selected preset is ready for import and visible in the Preset section.
- Lastly, apply it to the import preset; thus the Lightroom will start processing. Again, wait a few seconds to complete the process. Once you finish the import process, you can easily edit with the multiple editing features in Lightroom.
Method 3: Import DNG Files
The following are steps to apply to the DNG import process:
- Install Lightroom Presets in DNG Files. Groups of preset are added in this DNG file.
- Next, press the “+” key or import option and DNG Files format from the Preset folders collection. Here, you can choose various files by only holding and clicking on the respective preset individually.
- Interestingly, users can save these presets and apply them next time. For this, click on the three dots “⋮” at the top of the preset and wait a few moments. You can also easily export the photos or change the editing at any time.
How to Import Lightroom Presets on a Desktop?
First of all, the desktop computer must meet the system requirements before importing photo editing presets. Photographers may find it tricky and interesting to do advanced editing. However, for beginners, it might be complex to understand the process. But, it makes your editing process precise and manageable. Following are the desktop/PC Lightroom preset import methods:
1. Copy & Paste Method
To import presets on the desktop through this method users are required to follow the undermentioned process:
- First, purchase presets from the official Adobe Cloud website.
- Install the zip folder, which will have various template files for Windows.
- Copy the folder to “Adobe Lightroom Classic” in the upper left corner.
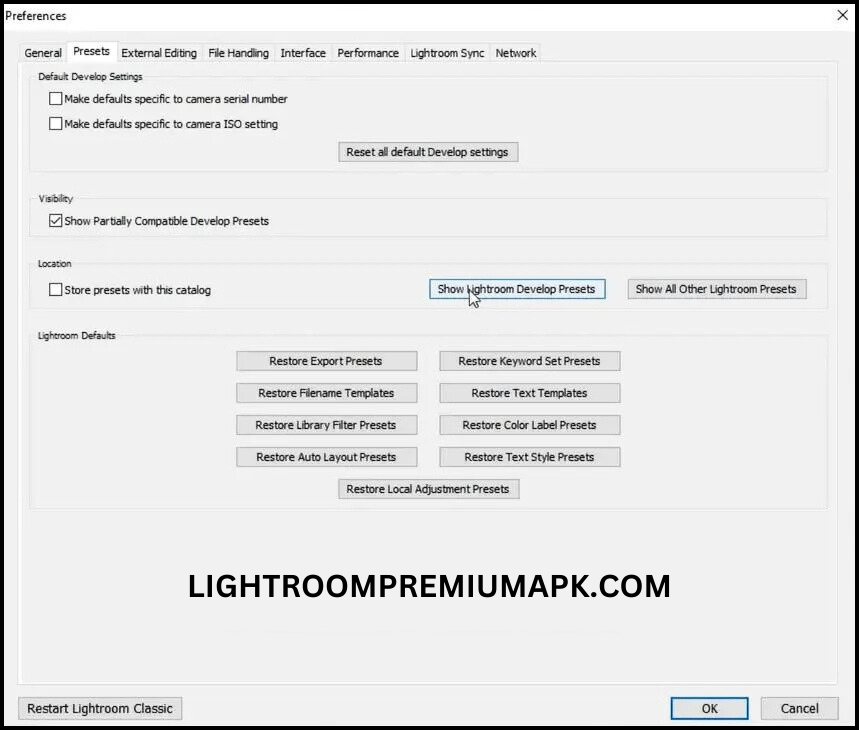
- When you click on the preferences, A window will open on your screen.
- Click on presets and select the “Show Lightroom Presets Folder” button.
- You will see the settings folder, and you can paste your preset files into the settings folder.
- Now, close all windows and click the “Quit option.”
- Then, you’ll notice that all presets are installed.
2. Drag and Drop Presets
Through this method, desktop users follow these steps for preset import in the Adobe Lightroom Classic version.
- Download the Lightroom Preset of your choice and save it on the Desktop or MAC.
- Next, open the Preset folder where you saved it.
- In the Lightroom Classic application, click on the “import” option. Thus, import will be active. You will be able to import the preset files from your PC. You can also apply to “Drag the Preset File” directly from the Lightroom Classic section. Hold on to the mouse cursor in the app, which automatically detects the preset file and imports it into the software.
- Lastly, all the imported preset files visible in the import section can now be easily applied when clicking on any Specific Preset file.
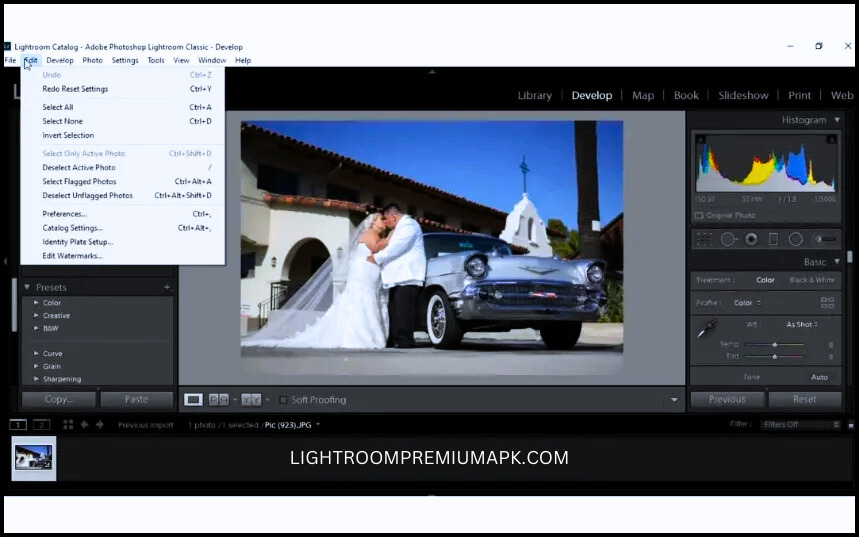
3. Import Preset Through Preferences
Users can also adopt this method for preset import on desktop through the following steps:
- Open Adobe Lightroom software on your PC.
- Scroll the mouse and click on the toolbar at the top.
- Click on the “Edit” →Go to the Preference tab →Click on Preset →click on the Lightroom “Develop preset.”
- Additionally, you can change the setting by clicking on the different options on the screen.
Troubleshooting Common Issues with Presets Import
You must know the common issues that may arise when applying how to import presets into Lightroom. These problems vary depending on the different versions of Preset Files in the Lightroom. For professional photographers, it’s important to tackle these issues confidently with effective creative skills.
Here, discuss some common errors and their solution that may arise during the photo editing process.
Apply Incorrect File Format
The wrong file format issues are most commonly created during the editing, specifically when editing multiple folders. Photographers mistakenly import the preset format, which is incompatible with their respective Lightroom versions. It’s unprofessional, thus essential to tackle these issues to speed up your workflow and enhance your editing skills.
For this problem, the photographer must keenly observe the application’s preset harmony. For instance, the XMP format is recommended for the latest desktop version and Lightroom Classic. For mobile, apply DNG files, specifically optimized to import preset in mobile device editing.
Duplicate Preset Files
Users may face duplicate preset file issues due to similar file names or duplicate presets when importing the file. These problems create resistance in Lightroom preset functions and complicate the preset import process. Due to this issue, the editing process might be blocked and it’s much difficult for photographers to locate the files in a specific location.
The solution to this issue is to rename any particular preset file and remove duplicate files to avoid such editing complications. Maintaining and organizing the folder structure to easily access the Lightroom preset and continue the import function without any disturbance.
Troubleshooting Methods
By applying the above methods and don’t get a solution then you can apply these advanced troubleshooting techniques:
- Press Alt(window) to reset the Lightroom preferences.
- You need to uninstall and reinstall the app to resolve errors in settings or bug files.
- Always apply the software updated version because it fixes the issue more smoothly.
Conclusion
How to import Preset into Adobe Lightroom? It’s necessary to learn the preset import process specifically if you want to become a professional photographer. All the methods are discussed in this article. Users need to integrate it to improve the editing significantly. Applying different techniques will enable the user to enhance their photography skills as well as achieve their desired outcomes more efficiently.
Lightroom presets downloaded for mobile and desktop users, both beginners and professional editors, can enhance their editing workflow. Expert photographers can apply more advanced preset tools to the quick-import process. By applying these methods and techniques, users can save time as well as ensure consistency and improved quality in their editing work.
Frequently Asked Questions
Meta Title
How to Import Presets into the Lightroom? Latest Guide 2024
Meta Description
Learn how you can import Lightroom presets quickly. Follow these step-by-step easy methods to enhance your photography editing workflow.